DaVnci Resolve won't import MXF files recorded by your Canon XC10? Or there is only audio, no video after importing MXF footages to DaVnci Resolve? Wait a second! Officially, MXF is covered in the list of DaVnci Resolve supported formats. Why would this still happen?
The XC10 is an all-in-one compact hybrid camera that features both 4K and Full HD video capture as well as 12 Megapixel stills. This probably causes DaVnci Resolve not opening MXF error or DaVnci Resolve freezing after Canon XC10 MXF importing if your computer hardware configurations lack enough power to handle the stress brought by compute-intensive video codec. Other cases might occur due to 4K XF-AVC container file attribute, with different variants of codecs. The best method to avoid any problem and save time is to convert Canon XC10 MXF footages for DaVnci Resolve.
MXF to DaVinci Resolve Converter
To import Canon XC10 MXF files successfully, DaVinci Resolve needs to be compatible with the specific codecs used in the MXF files. If not, you'll experience Canon XC10 MXF importing error. Next, let me show you how to fix "can't import or edit MXF in DaVinci Resolve smoothly" problem caused by incompatible codec.
Transcoding should be a very helpful method. To do this, you can adopt Acrok MXF Converter for help. It makes an easy work of converting Canon XXC10 MXF videos to DaVinci Resolve supported MP4 H264, MOV ProRes, DNxHD MOV, etc. formats so as to fix MXF codec incompatibility or missing issues. As the video quality, don't worry too much. With the constantly updated conversion algorithm and the advanced High Quality Engine, it guarantees you the output MOV/MP4 video with up to 99% quality reserved, wrinkles or freckles in image still clear enough to count.
Free download Canon MXF to DaVinci Resove Converter
How to transcode Canon XC10 MXF to Import to DaVinci Resolve with 100% Success Rate?
Step 1: Add source MXF files
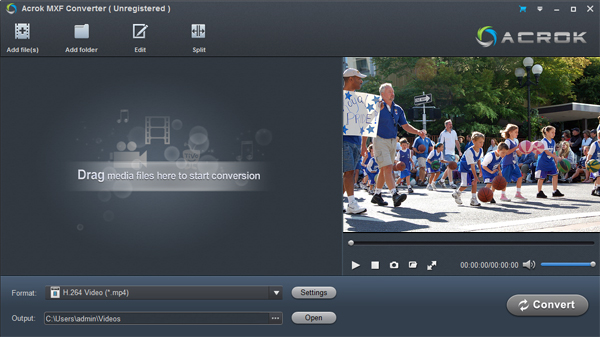
Launch Acrok MXF Converter on your computer and then click the "Add file” button to browse and add source Canon XC10 movies from your computer drive to Canon MXF to DaVinci Resolve Converter.

Step 2: Set output format
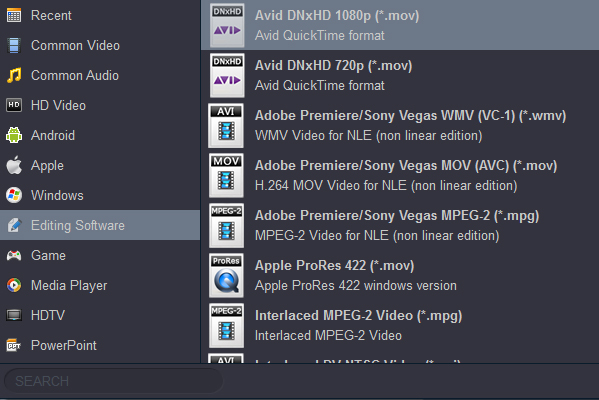
Click "Format" bar and move mouse cursor to "Common Video" category. Here you can select H.264 MP4 as the output format. Also you can choose DNxHD and Apple ProRes codec under editing software category for converting Canon XC10 to DaVinci Resolve . Optionally, you can click the "Settings" button to adjust frame rate, resolution, bit rate, and more.

Step 3: Set output directory
On the main interface, click the big green "Convert” button. Set output directory in the "Output” box on the popup sidebar on the right.
Step 4: Convert MXF files to DaVinci Resolve
Finally, click the bottom "Convert" button on the right sidebar to start to convert MXF files immediately. You could view the whole conversion process on the converting panel. After the conversion completes, you could then freely transfer the converted MXF files to your DaVinci Resolve for editing.
Tip: Acrok Video Converter Ultimate is the best BD/DVD/Video solution for PC users to backup BD/DVD, compress disc and transcode video clip to almost all popular video and audio formats. If you want to get a more powerful converter, it is a good choice.


