![]()
 >
>
Came up on issues importing and editing MXF video from Sony VENICE 2 in Final Cut Pro or Premiere Pro CC? If so, you may wish to read this post. It displays a workaround to transcode Sony VENICE 2 MXF video to Final Cut Pro/Premiere Pro CC friendly format for editing directly and smoothly.
The VENICE 2?builds upon the strength of the original VENICE with new features including a compact design, internal recording and the option for two different sensors: the newly developed full-frame 8.6K sensor?or?the original 6K VENICE sensor.'The VENICE 2 also inherits popular features from the original VENICE including color?science,?Dual Base ISO and 8-stops of built-in ND filters. Full-frame digital cinema camera with internal X-OCN recording and choice of 8K and 6K sensors.
X-OCN produces file sizes much smaller than typical camera RAW, but unlike conventional codecs, X-OCN offers 16-bit scene linear encoding. So, you get the ultimate in tonal expression, longer record times, faster file transfers and more economical post-production. But the X-CON .mxf isn’t a good editing format for Final Cut Pro and Premiere Pro CC.
If you copy the Sony VENICE 2 footage onto a hard drive intact, you can then import it into Premiere Pro CC. The advantage of this approach gives you a backup of the MXF files. Please remember that don’t mess with the files within the video folder, just copy the whole folder. If for what ever reason you dig into the folder only with separate clips maintained, Premiere Pro CC will do nothing with Sony VENICE 2 X-OCN footage. In that case, you will need third party software to convert them first. Read on to find a step-by-step guide on how to convert X-OCN recordings to H.264 or MPEG-2 codec for Premiere Pro CC on macOS Monterey or macOS Big Sur. As for Final Cut Pro users, you need to transcode Sony VENICE 2 MXF footage to ProRes codec on Mac.
Overall, Acrok Video Converter Ultimate for Mac is the best choice to get the work done. The program is an easy-to-use yet professional program which can be used as a X-OCN, XF-AVC, H.265 and AVC-Intra/AVC-LongG Converter under Mac OS X. With it, you can effortlessly convert VENICE 2 MXF to edit in Final Cut Pro, Premiere Pro CC, DaVinci Resolve 18, Avid Media Composer and more NLEs without problems. If you are running a Windows computer, please turn to the alternative Windows version - Acrok Video Converter Ultimate. Below is how. Just take a look at the brief guide below.
Free download Sony X-OCN Video Converter
Install and run Acrok Video Converter Ultimate for Mac as the best X-OCN Video Converter. When its main interface comes up, click “Add File” or “Add Folder” to load your source media into this software.
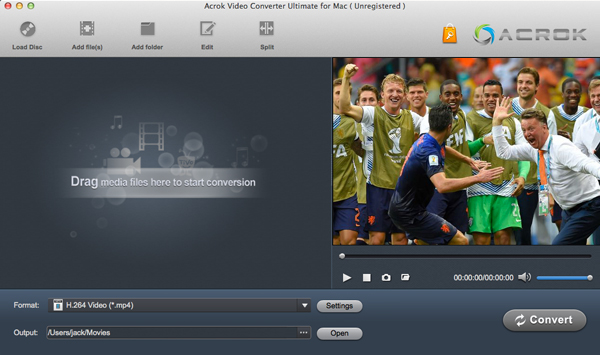
Note: While importing MXF clips into the program for conversion, please make sure you have the entire MXF file structure as it saved on your camcorder. If you only have some loose .mxf clips, you files will have image only without audio.
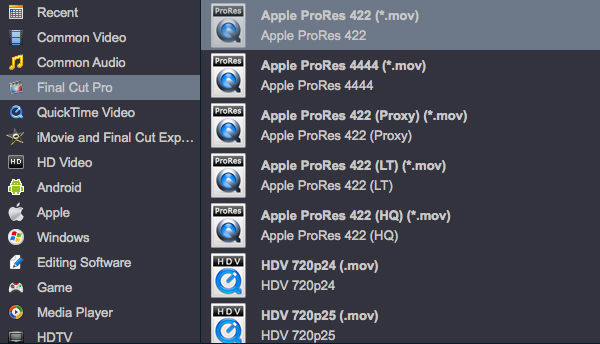
To import and edit Sony VENICE 2 MXF files in Final Cut Pro on Mac, please select Apple ProRes 422 MOV or Apple ProRes 4444 MOV under “Final Cut Pro” category.
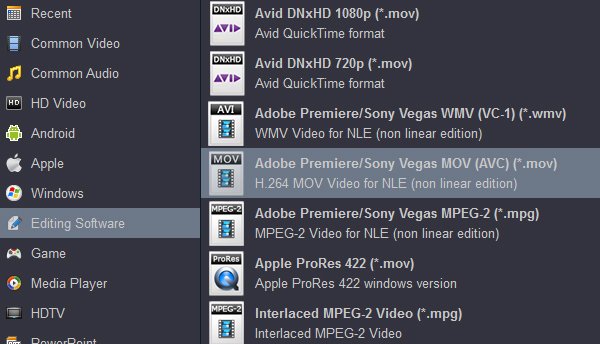
To convert VENICE 2 MXF footage for using in Premiere Pro CC, choose Adobe Video AVC (*.mov) or Adobe MPEG-2 (*mpg) as output format under “Editing Software” column.
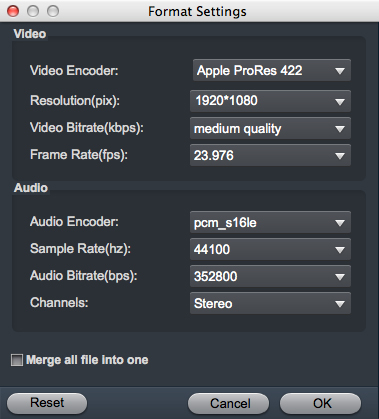
If necessary, you can click “Settings” button and go to “Profiles Settings” panel to modify video and audio settings like video encoder, resolution, video bit rate, frame rate, aspect ratio, audio encoder, sample rate, audio bit rate, and audio channels.
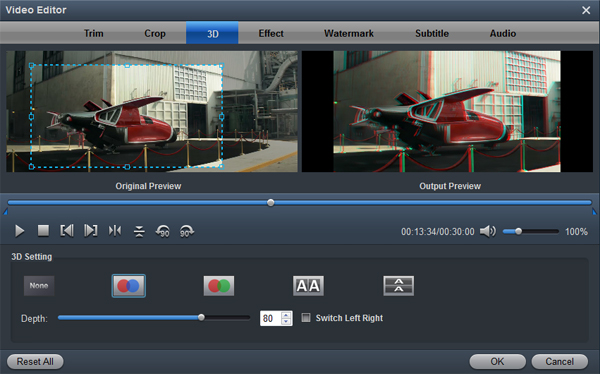
If you want to get 3D video for playing and sharing, you can click Edit icon to add 3D effects onto your loaded MXF files. You can also do some editing on the file you want to convert, like cropping unwanted frame from clips, trimming the length of the file, merging separate videos into a new one for your smooth editing.
When ready, click “Convert” to start MXF video to Final Cut Pro or Premiere Pro CC supported format conversion on Mac. Once the conversion process is complete, you can click “Open” button to get the generated video files for editing in Final Cut Pro or Premiere Pro CC with optimum performance.
Additional Tips:
1. If you don’t want to wait for the entire conversion process, you can tick off “Showdown computer after conversion” and go away to do other things.
2. This versatile Video Converter can also export optimal formats for DaVinci Resolve 18, Avid Media Composer, iMovie, and hot digital devices. If you want to edit VENICE 2 MXF media in DaVinci Resolve, please choose the “4K Video > 4K MP4 Video (*.mp4)” as output; For Avid Media Composer, choose the “Editing Software > Avid DNxHD 1080P (*.mov)” as output format; For playing the 4K and HD videos on smart tv, please choose the “Common Video > H.264 Video (*.mp4)”.

Well to be honest i'm a big fan of Acrok Video Converter Ultimate which works perfect and great. next thing is we can do as many conversion as we want, I mean we can rip, convert or edit by using this software.
Dowling, Paul
![]()
Copyright © 2026 Acrok Studio All Rights Reserved. Terms and Conditions | Privacy | Refund Policy