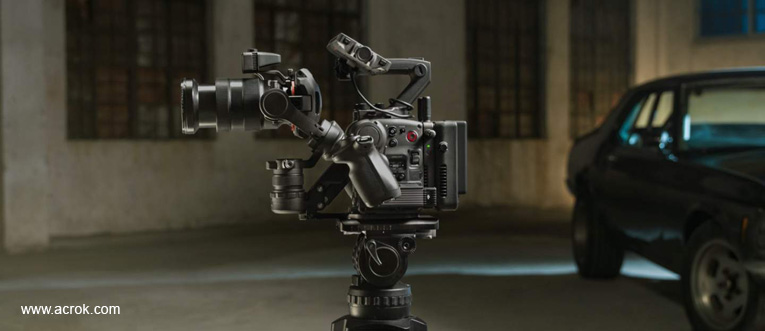
DJI has unveiled the Ronin 4D, a 4-axis camera system designed to make high-end productions more efficient. Powered by DJI"s own flagship chipset, CineCore 3.0 is the most powerful cinematic imaging processor from the company yet. This full-frame gimbal camera comes in 8K and 6K versions. The Zenmuse X9-8K is capable of recording up to 8K at 75fps, while the X9-6K can capture up to 6K at 60fps. After recording, users may be looking for a way to import DJI Ronin 4D footage into Premiere Pro CC or FCP X for further editing to get their own masterpiece. These users may encounter problems similar to the following:
" Can't import RAW files from DJI Ronin 4D 4-Axis Cinema Camera to Premiere Pro CC.
Hey all, I've been trying to import some DJI Ronin 4D 6K RAW files that have the video and audio already paired together, but I constantly receive errors no matter what I do. I've tried using the transfer software to copy the files directly from the hard drive into the project bin, but the transfer software isn't internally compatible with Premiere Pro CC. Any ideas?"
"How can I edit DJI Ronin 4D 4-Axis Cinema Camera RAW fies in Final Cut Pro X without rendering?
Hi, I filmed using DJI Ronin 4D camera using 3 clip mics and want to edit in Final Cut Pro X. I’ve tried several programs but always loss some of the audio channels. Please I need to edit both the original channels in my FCP X. How can I solve this?"
The 6K and 8K files shot by DJI Ronin 4D cameras are highly compressed by RAW format and they are very hard to deal with during video editing. That's why users usually run into incompatibility issue when editing DJI Ronin 4D files with a post-production tool like Final Cut Pro X and Premiere Pro CC on Mac or Windows. To make your editing process simpler and less resource-intensive, the easiest and most efficient solution is to transcode RAW to editable format for FCP X/Premiere Pro CC.
With the help of Acrok Video Converter Ultimate for Mac, a top RAW File Converter, this can be done easily. Apart from fast converting DJI Ronin 4D RAW to ProRes codec for Final Cut Pro X, transcode DJI Ronin 4D RAW to MPEG-2 for Premiere Pro CC basically, it also supports encoding all 8K, 6K, 5K, 4K, or Full HS files to other video codec for editing in other hot editing software. So, you can easily import the DJI Ronin 4D RAW recordings to different video editing software without any video/audio problem and save the rendering time. For Windows PC user, please get the right Windows version Acrok Video Converter Ultimate. Just download it and follow the step-by-step guide to transcode RAW files for using in FCP X and Premiere Pro CC.
Free download Acrok Video Converter Ultimate - Best RAW Video Converer
3 Steps to Convert DJI Ronin 4D RAW for FCP X/Premiere Pro CC
1
Add RAW files
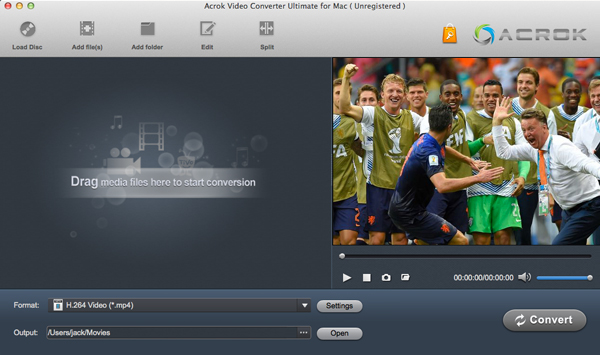
Drag and drop your DJI Ronin 4D RAW files from where you stored to the program. Several files can be selected and processed at the same time to save up time. Batch conversion is supported so you can add multiple files to convert at a time.

2
Choose output video format
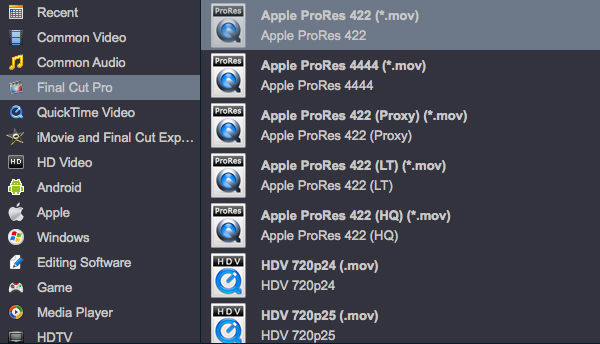
Now click the Format bar to reveal output panel. And and mouse cursor to Final Cut Pro category. You'll find all the five ProRes formats are provided. Here you can select Apple ProRes 422 MOV or Apple ProRes 4444 MOV as output format.

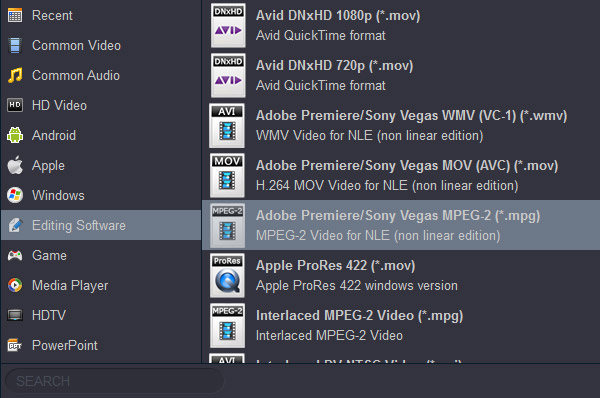
If you are Premiere Pro CC user, please select Adone MPEG-2 MPG format as output format, you can get this profile under Editing Software category.

Tip: Click the Settings button and customize proper video/audio parameters if necessary. Video size, bitrate and fame rate are flexible and can be adjusted as you like. This DJI Ronin 4D RAW Video Converter also possesses powerful video editing functions, such as rotate, clip, crop, merge, adjust effects, add 3D effects and personal watermark and more.
3
Select a Location Folder and Convert
Choose a local folder where you want to save the converted files. From the top of that window, navigate to the Convert button, hit it and your DJI Ronin 4D RAW files will be converted in a moment and saved to the selected folder as MOV or MPG files.
When finished, the output file is ready for being imported to Final Cut Pro X or Premiere Pro CC for editing. All versions are supported. Finally, Open your editing software. Drag-and-drop your file to the left pane of the window. Once the converted video is imported successfully, you can do all you want with it in Final Cut Pro X and Premiere Pro CC.
 Secured Shopping
 30-day Money Back
 Automatic Updates
 Customer Service


