Have shot some 4K MP4 recordings with your Canon EOS R1 and wish to load the 4K XF-HEVC S/XF-AVC S videos into DaVinci Resolve for some professional post workflow? The following article will show you the workflow of Canon EOS R1 4K MP4 with DaVinci Resolve and how to smoothly import Canon EOS R1 4K MP4 files to all versions of DaVinci Resolve.
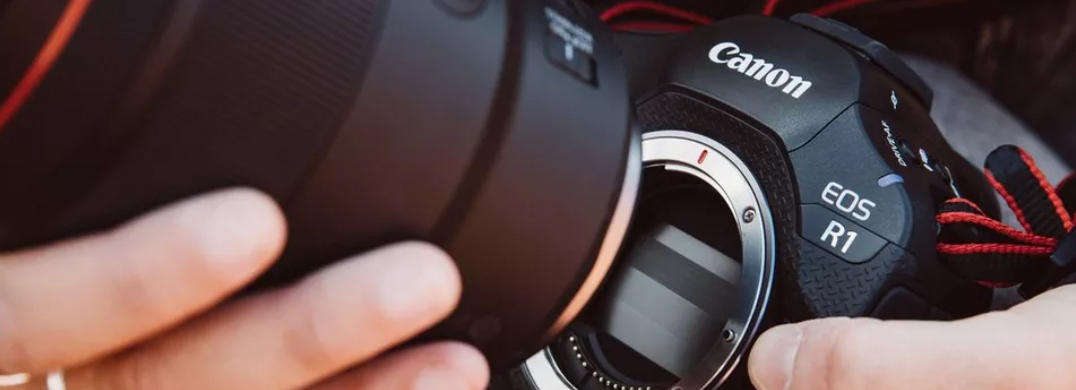
As you might expect on a Canon 1-series camera, the EOS R1 includes Canon's latest and fastest technology for capturing and processing images. The EOS R1 is built around an all-new 24.2MP Stacked CMOS sensor. Helping keep both photos and video sharp and stable, the EOS R1 uses a well-rounded image stabilization system using three distinct methods: in-body sensor-shift, optical, and an independent Movie Digital IS system purpose-built for video. Further, the Canon EOS R1 can output MP4/XF-AVC S/XF-HEVC S 4:2:2/4:2:0 8/10-Bit video to an SD card.
Can't open Canon EOS R1 MP4 in DaVinci Resolve - Solved
XF-HEVC S and XF-AVC S short films are original Canon video formats that are extended as H.265/HEVC and MPEG-4 AVC/H.264, respectively. We can't load and play the videos in DaVinci Resolve. As we know, DaVinci Resolve ediitng software native supports DNxHD, H.264 and Apple ProRes codec, so we can convert Canon EOS R1 MP4 videos to DaVinci Resolve supported video format via third-party software. To generate new codec from Canon EOS R1 MP4, what you need is a powerful 4K Video Converter and Canon Video Converter. Here, we highly recommend Acrok Video Converter Ultimate to you. The program has perfect importing support for the 4K MP4 video shot with Canon EOS R1. Thanks to its batch conversion mode, you can batch load multiple 4K Canon EOS R1 videos into the program.
Free download Canon Video Converter here.
How to convert Canon EOS R1 videos for DaVinci Resolve?
1
Import Canon EOS R1 footage
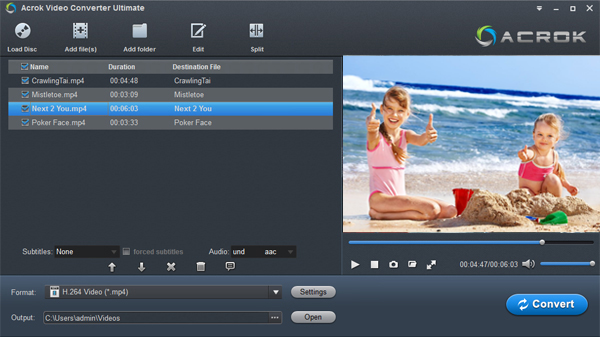
Download the free trial version of the Canon EOS R1 Video Converter. Launch it on your computer. Click "Add File"?menu on the top tool bar to import 4K XF-HEVC S/XF-AVC S video into the software.

2
Define the output format
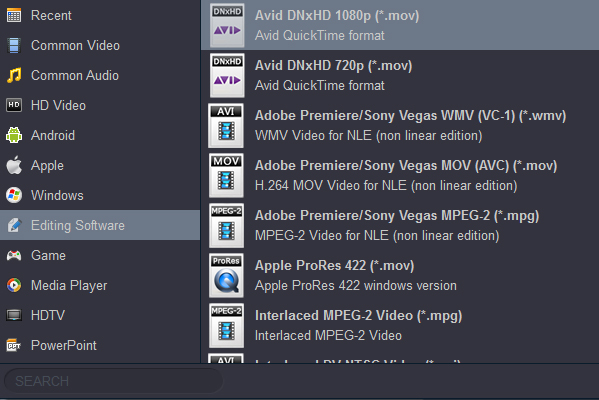
From the Canon EOS R1 MP4 to DaVinci Resolve Converer, you can select many video audio format as the output option as your needs. To edit Canon 4K MP4 videos in DaVinci Resolve smoothly, click the Format bar, from its drop-down list, go into "Editing Software " category then select DNxHD MOV or Apple ProRes 422 MOV as the output format.

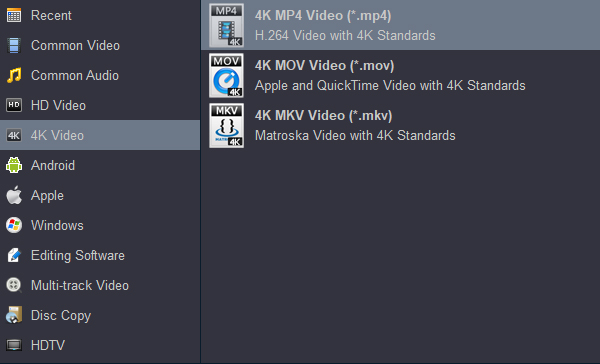
For DaVinci Resolve 19, 18, 17 versions, please choose "4K MP4 Vidoe (*.mp4)" under "4K Video" category. This option can help you convert the video to a 4K format supported by DaVinci Resolve.

3
Start video conversion
Go back to the main interface and press the "Convert" icon on the right-bottom to start Canon EOS R1 4K XF-AVC S and 4K XF-HEVC S to DaVinci Resolve supported codec encoding process. Once the conversion process shows in 100%, click "Open" button to get the output videos. Create a project and start editing your Canon EOS R1 4K Videos in DaVinci Resolve with light speed.


