

 >
Edit Sony a7R VI MP4 in Final Cut Pro/Premiere Pro
>
Edit Sony a7R VI MP4 in Final Cut Pro/Premiere Pro
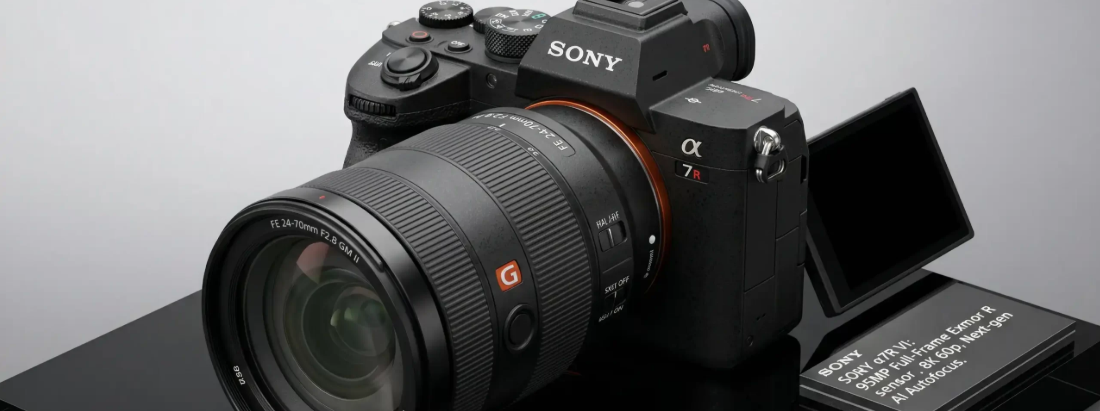
Why do we have to spend a long time rendering Sony a7R VI MP4 videos when we load and edit them in Final Cut Pro/Premiere Pro? The Sony a7R VI is a powerhouse of a camera. With its 66MP stacked sensor, 8K 30p video capture via 8.2K oversampling, and 4K 120p slow-motion capabilities, it delivers image quality that was unthinkable just a few years ago. But there's a catch.
You've just returned from a shoot, filled with excitement. You plug your SD card into your computer, launch Final Cut Pro or Premiere Pro, and drag your beautifully captured a7R VI MP4 files into the timeline. Then—nothing. Or worse, your timeline turns into a slideshow, stuttering and freezing as your high-end computer struggles to keep up.
If this sounds familiar, you're not alone. The Sony a7R VI produces some of the most spectacular video footage on the market, but its advanced recording formats can be a nightmare for video editors. In this guide, we'll explain why your a7R VI MP4 files won't import or play smoothly in Final Cut Pro and Premiere Pro—and what you can do about it.
You've just finished shooting a client project—an interview with B-roll, all captured in 4K 60p on your a7R VI. You get back to your studio, fire up Final Cut Pro, and click Import. The files show up in the media browser, but when you try to add them to the timeline, you get an error message:
"File format not supported" or "This file contains unsupported media."
You try restarting Final Cut Pro. You try restarting your Mac. Nothing works. The footage is right there on your drive, but Final Cut Pro refuses to touch it. You start Googling frantically, and a sinking feeling sets in—this is going to take hours to fix.
You're working on a personal project—a cinematic short film shot in 8K 30p on your a7R VI. You managed to get the files imported into Premiere Pro without any error messages. Success, right?
Wrong. As soon as you drop a clip onto the timeline and hit play, the playback stutters, drops frames, and freezes. Your playback resolution is set to 1/4, you've closed every other application, and your computer is a high-spec machine with a powerful GPU. But Premiere Pro just can't handle the footage. You spend more time waiting for the timeline to render than actually editing.
The Sony a7R VI records video in advanced formats that push the boundaries of what consumer and even prosumer editing workstations can handle. Here are the main reasons why your editing software struggles with these files.
The a7R VI's primary video recording format is XAVC HS, which uses the H.265/HEVC codec. While H.265 is incredibly efficient for storage—delivering high-quality video at significantly smaller file sizes than H.264—it is extremely demanding to decode.
Why this matters for editing:
H.265 is an inter-frame (long-GOP) codec, meaning it doesn't store every frame as a complete image. Instead, it stores only the changes between frames, which saves space but requires massive computational power to reconstruct each frame during playback. Video editing software needs to decode these frames in real-time, and even the most powerful computers can struggle with H.265 footage, especially at 4K or 8K resolutions.
The irony: H.265 is fantastic for capturing and storing footage, but it was never designed for editing. It's a delivery codec, not an editing codec.
The a7R VI records video in 10-bit color depth with 4:2:0 or 4:2:2 chroma subsampling. This is great for color grading—10-bit footage gives you 1,024 shades per channel, compared to just 256 in 8-bit.
Why this matters for editing:
Not all versions of editing software support 10-bit 4:2:2 H.265 natively. For example, DaVinci Resolve (Free) does not support 4:2:2 10-bit H.265 on Windows. Premiere Pro and Final Cut Pro may require additional codecs or plug-ins to handle these files properly. Without the right support, your editing software simply won't recognize or decode the footage.
The a7R VI can record 8K video at 29.97p with a bitrate of up to 400 Mbps and 4K video at up to 119.88p with a bitrate of up to 200 Mbps.
Why this matters for editing:
8K video contains four times as many pixels as 4K. Every frame is a 33-megapixel image (7680 × 4320), and your editing software has to process 30 of these per second. That's an enormous amount of data. Add the H.265 compression on top, and you have a perfect storm of computational demand that brings even high-end workstations to their knees.
The a7R VI records audio in LPCM (Linear Pulse-Code Modulation) at various sample rates and bit depths, including 48 kHz 16-bit, 48 kHz 24-bit, 96 kHz 24-bit, and even 32-bit float with compatible accessories. While LPCM is widely supported, some older versions of editing software may have trouble with certain LPCM configurations.
| Camera Setting | Why It Causes Problems |
|---|---|
| XAVC HS (H.265) | Inter-frame compression makes real-time decoding extremely CPU/GPU intensive |
| 10-bit 4:2:2 | May not be supported natively by some editing software versions |
| 8K 30p (400 Mbps) | Massive data rate overwhelms storage and playback systems |
| 4K 120p (200 Mbps) | High frame rate demands extreme processing power |
| LPCM audio | Some formats may require additional codec support |
You can't easily import or edit Sony a7R VI MP4 files in Final Cut Pro or Premiere Pro because:
While this guide focuses on why the problem occurs, here's a quick preview of your options:
Install required codecs – For Windows, you may need the HEVC Video Extensions from the Microsoft Store. For Final Cut Pro, ensure Pro Video Formats and the Sony XAVC/XDCAM Plug-in for Apple are installed.
Use proxy workflows – Both Final Cut Pro and Premiere Pro allow you to edit with lightweight proxy files while keeping your original footage for the final export.
Transcode to an editing-friendly codec – Convert your footage to Apple ProRes (for Final Cut Pro) or DNxHD/DNxHR (for Premiere Pro) before editing. Highly recommended
This solution not only resolves the compatibility issues between editing software and videos recorded by the Sony a7R VI, but also saves you from spending a significant amount of time rendering videos during the editing process.
Free download Sony a7R VI Video Converter here
 120% Safe & Clean 120% Safe & Clean
Use in-camera proxy recording – The a7R VI supports simultaneous proxy recording, generating lower-resolution files that are much easier to edit.
1. Install and run the best Sony a7R VI Video Converter on your conputer, then click "Add file" icon to load your .mp4 video files.
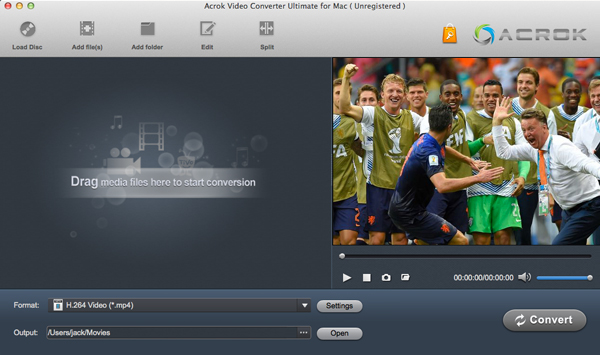
2. Click "Format" bar to set the output format.
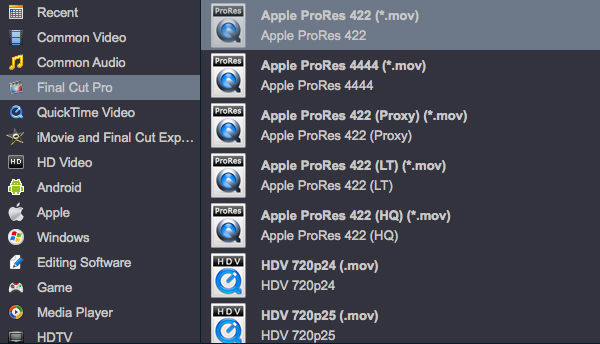
(Final Cut Pro Supported Formats)
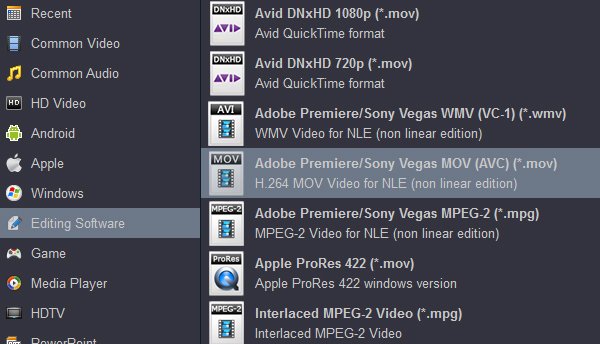
(Premiere Pro Supported Formats)
Tip 1: If need, you can click "Settings" to freely change the video and audio settings. To keep the best quality for editing, you'd better keep your original settings.
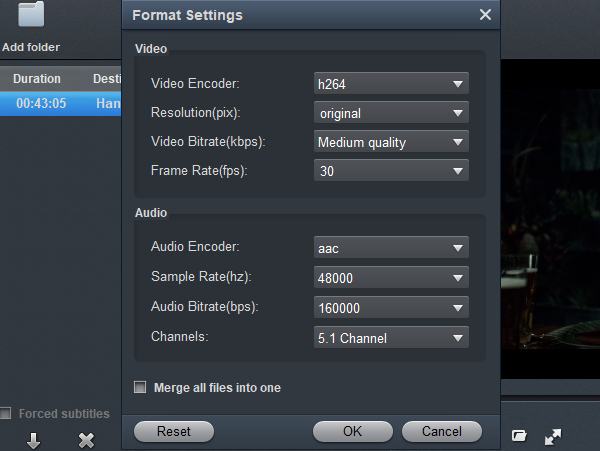
(Settings)
Tip 2: This software offers a few simple but necessary editing tools—feel free to try them out. Just select the video you wish to edit, click the Edit icon, and you'll be taken to the editing screen, where you can operate based on your own requirements.
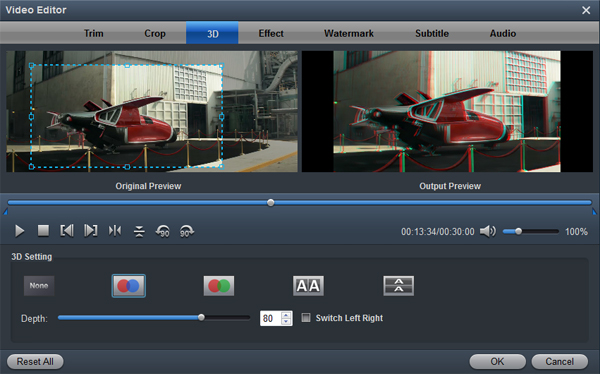
(Edit Sony a7R VI Video)
The Sony a7R VI is an extraordinary camera that produces breathtaking video. But its advanced recording formats—H.265, 10-bit color, 8K resolution, and high bitrates—come with a cost: they make editing a challenge. Understanding why your editing software struggles with these files is the first step toward building a workflow that actually works.
The good news is that with the right tools and workflow adjustments—whether that's installing codecs, generating proxies, or transcoding—you can turn your a7R VI footage into a buttery-smooth editing experience. Your footage is worth the extra effort.


I have had no problems with the Acrok Video Converter Ultimate software. The user interface was so easy to use. No tutorials were necessary and I found it very user friendly.
HAMILTON, MICHAEL
Copyright © 2026 Acrok Studio All Rights Reserved. Terms and Conditions | Privacy | Refund Policy